Lecture 2: Definitions
This assignment is due on Tuesday, January 14 at 11:59pm. Submit it using Handin as assignment lecture2. You only need to submit the first 6 exercises. Your submission is only accepted if the message “Handin successful” appears.
1 Install the Handin plugin
All lecture assignments and problem sets will be submitted through the Handin server. To use Handin in DrRacket, you’ll need to install a plugin in your DrRacket. Follow the instructions on this page to install Handin.
2 Defining constants (variables)


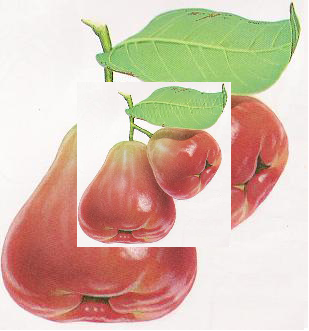
Hint: if you’re looking for an image to use, try this one.
Introduce a constant definition for the original image you downloaded, so that the Definitions Window contains only a single copy of a single image.
You can submit any assignment any number of times until the deadline. (We do not accept late submissions.)
In case you make a mistake, Handin sometimes provides helpful messages.
In case you lose your work, you can retrieve your submission from Handin.
We only grade your last successful submission. (Moreover, only your Definitions Window is submitted, so each time you submit, your Definitions Window should include all your work so far on that assignment.)
Troubleshooting If you encounter any trouble, one way to get help is to post a screenshot to Discord.
Troubleshooting If Handin says “file to handin is too big”, it means that your submission cannot be accepted because it exceeds the maximum upload size: 7 MB. Be sure that any image that you’ve included in your file is small enough (you may need to rescale it in an image editor).
The code written in the videos above is available for your reference. To download it, don’t use “Save Page As” or “Save As”; use “Save Link As” or “Download Linked File” in your Web browser. If you can’t find the command, try right-clicking or two-finger-tapping or long-pressing.
3 Defining functions

; framed : Number -> Image ; frame the image scaled by the given number (define (framed n) FILL-IN-THIS-BLANK)
; shrink : Number -> Image ; make a smaller version of our image ; (shrink 5) should produce (framed .9509900499) (define (shrink n) (framed (expt 0.99 n)))
Try to use this new function shrink in the Interactions Window.
Pay attention to how this new shrink function uses your existing function framed. In other words, the definition of shrink contains (framed ...). The input to framed is the proportion (expt 0.99 n); this sub-expression uses the built-in function expt for exponentiation.
Optional: Review operators and definitions.
Optional: Enjoy more examples of animate.
For the rest of this page, you don’t need to submit anything, but do watch the videos and try the exercises anyway. We’ll work through similar material together in class.
Exercise 7. Show the calculation of (shrink 50) step-by-step. Use the Stepper to confirm that your steps are correct.
Optional: Read Chapter 2 of the textbook.
Optional: Learn a little more about DrRacket.